Drowning and First Aid
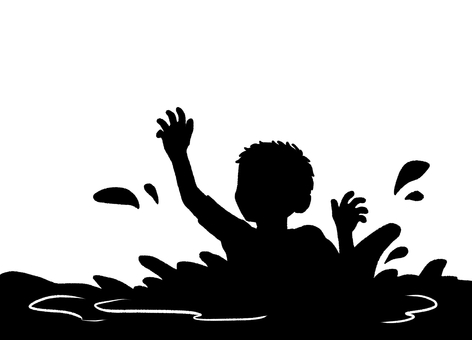
It only takes seconds. Unlike the dramatic scenes we see in movies, drowning is often silent, swift, and easily missed. As parents, caregivers, friends, or even strangers, knowing what drowning truly looks like—and how to respond—can mean the difference between life and loss. In this post, we’ll uncover the hidden signs of drowning, the correct first aid steps to take (including CPR with rescue breaths), and practical safety tips to help keep your family and everyone else protected around water.
What Does Drowning Look Like?
Drowning doesn’t look like the dramatic scenes we see in movies. It’s often silent and quick, so staying vigilant is key. Here’s what to watch for:
- Silent Struggle: A drowning person can’t call for help—they’re using all their energy to breathe.
- Bobbing Up and Down: Their mouth may dip below the water, pop up briefly to gasp, then sink again.
- Stiff Arms: Instead of waving, their arms may be out to the sides, pressing down on the water to stay afloat.
- Still Body: They might appear to be standing upright in the water, with no kicking or flailing.

This struggle can last just 20-60 seconds before they start to sink, so quick action is critical. Even strong swimmers can drown, and kids are especially at risk—drowning can happen in as little as 1 inch of water in bathtubs, buckets, or ponds. Never take your eyes off children near water!
First Aid for Drowning
If you see someone in trouble, stay calm and follow these steps. (Note: These are general guidelines—consider taking a CPR class from a local hospital for hands-on training!)
For Adults
1. Get Help
Alert a lifeguard or ask someone to call the local emergency line. If you’re alone, proceed with the steps below.
2. SAFELY Remove Them
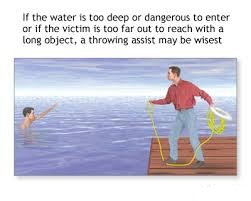
Carefully pull the person out of the water without putting yourself in danger. If you can't swim or you are likely to drown also, or you are unsure, do not get into the water. If a stick or rope could reach the person, trying using those, with caution, to pull them out instead of going it. Or call for help instead.
3. Check Responsiveness
Shout and tap their shoulder. If they don’t respond, lay them on their back on a firm surface.
4. Start CPR - FOR ADULTS
i. Compression
Kneel beside them, place the heel of one hand on the center of their chest (at the nipple line), and put your other hand on top. Press down hard (about 2 inches) at a rate of 100-120 beats per minute. Let the chest fully rise between compressions.


ii. Airway
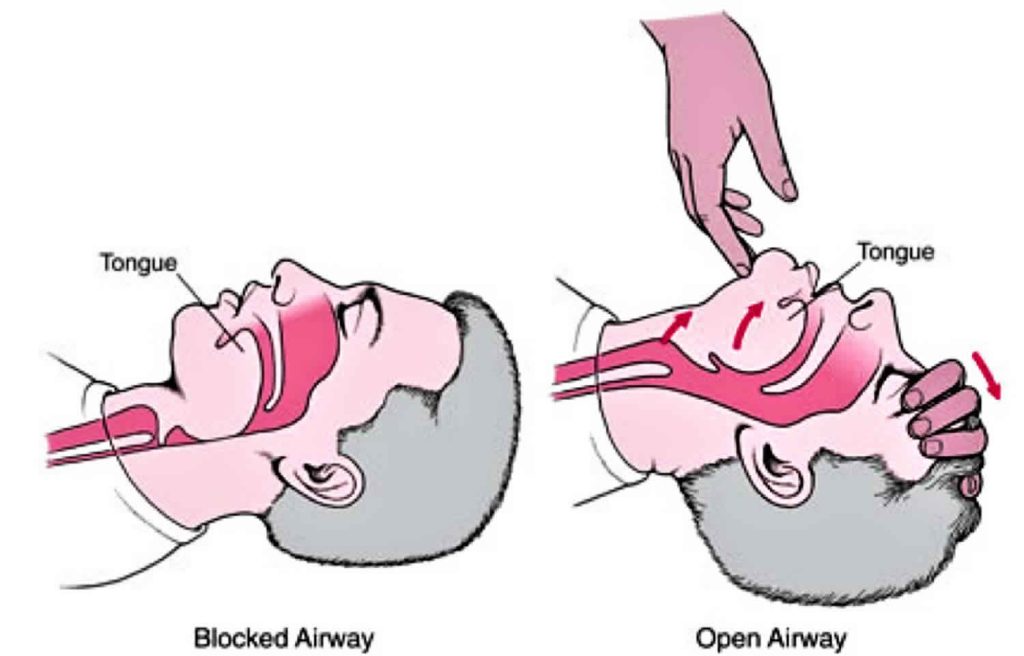
Tilt their head back and lift their chin.
iii. Breathing
If they are still not breathing, pinch their nose, seal your mouth over theirs, and give two 1-second breaths, watching for chest rise (breathing deeply into the mouth with your mouth sealed to theirs in other to get air into their lungs). If the chest doesn’t rise, adjust the head position and try again.
Continue with 30 compressions followed by 2 breaths until they respond or help arrives.
For Kids and Babies
i. Compression
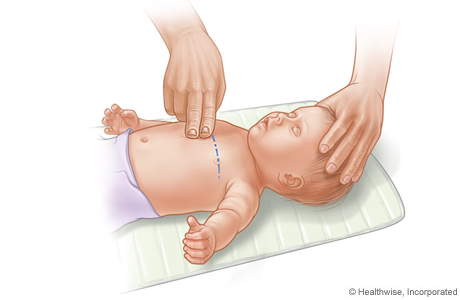
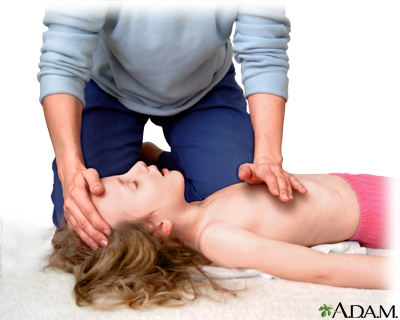
For a child, use one hand to compress the chest about 2 inches. For a baby, use two thumbs in the center of the chest, pressing about 1.5 inches. Aim for 100-120 compressions per minute.
ii. Breathing
For kids, pinch the nose and breathe into their mouth. For babies, cover both their nose and mouth with your mouth and give gentle puffs. Adjust head tilt carefully, especially for babies.
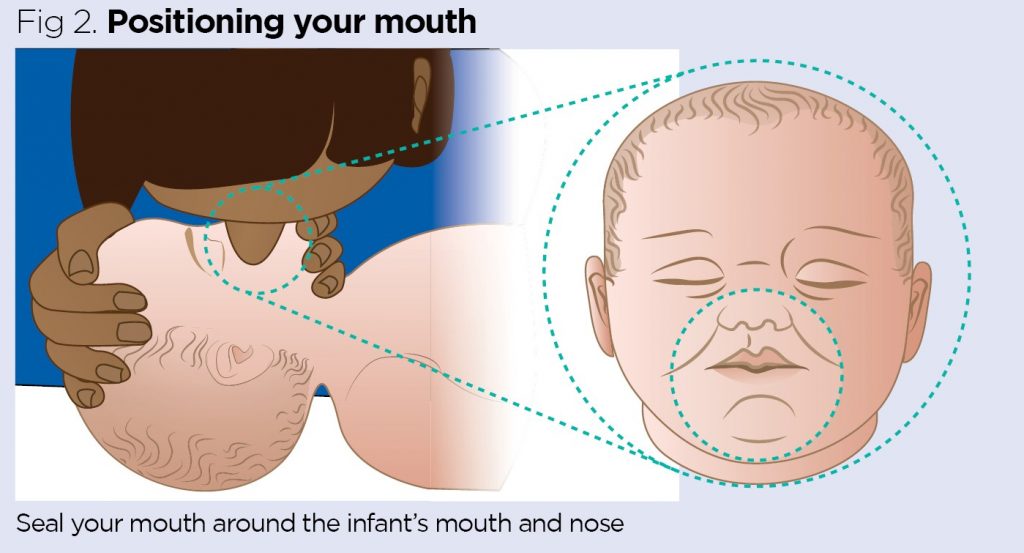

Follow the 30:2 ratio (30 compressions, 2 breaths) until they respond or help arrives. If two people are present, give breaths after every 15 compressions and switch roles to avoid fatigue.
If you’re not comfortable with rescue breaths, keep doing compressions—it’s better than doing nothing!
After They’re Responsive
Once the person starts moving, coughing, or breathing normally:
- Recovery Position: If they’re expelling water or vomit, roll them onto their side to keep their airway clear.

2. Prevent Hypothermia: Replace wet clothes with dry ones or cover them with blankets, as hypothermia is a risk even on warm days.
3. Monitor Closely: Check their breathing, pulse, and awareness. Even if they seem okay, seek medical advice, as complications can arise later.
Phases of Drowning
Understanding the stages of drowning helps explain why it’s so urgent.
- First Phase: Water enters the lungs, making breathing difficult.
- Second Phase: The body stops breathing to protect itself, leading to oxygen loss and possible unconsciousness within minutes - if you continued breathing, water will continue to fill the lungs, making it worse.
- Third Phase: Hypoxia (low oxygen) causes seizures and bluish skin, signaling a critical emergency.
Staying Safe Around Water
Here are some tips to keep your water adventures worry-free:
- Stay Vigilant: Cold water, currents, and unexpected slips can catch even strong swimmers off guard. Always supervise kids closely.
- Respect the Water: Avoid swimming in areas marked unsafe, and don’t go too far from shore.
- Watch for Hypothermia: Dry off thoroughly and warm up after swimming, especially in chilly water.
- Swim with a Buddy: Never swim alone, and choose spots with lifeguards when possible.
- Avoid Alcohol: Alcohol impairs judgment and increases drowning risk—save the drinks for after swimming.
- Know the Stats: Two-thirds of drownings happen inland (lakes, canals, etc.), and nearly half involve people who didn’t plan to enter the water. Men, especially young men, are at higher risk.
Final Splash
Drowning can happen fast, but being prepared can save lives. Keep an eye out for the subtle signs, learn basic first aid, and always prioritize safety. Whether you’re at the pool or a lake, let’s make every water moment fun and safe.
Got a water safety tip/story or a concern to share? Reach out to us—we’d love to hear from you! Share this and help safe a life!